
![]()
Welcome to the next instalment to our ‘Beginners Guide To D&D’ series, if you have not already read at least Part One – Basic Setup, I recommend going back and reading that post first. Otherwise, welcome and I hope you enjoy.
In today’s post I am going to be talking about how to build your character for your D&D campaign. You can do this on your own before you meet together to start your first campaign, or, you can do what we did our first game and allocate the first hour into building your characters together. This is a good way to ensure you have a well rounded party where even if you have two elvish rouge’s, you can each pick different backgrounds and areas your character excels in. I have put together character specially for this post so I can run through how I built him from the very beginning. To keep things simple, I have chosen a race and class that does not use magic as I feel that magic casting deserves its own post later on.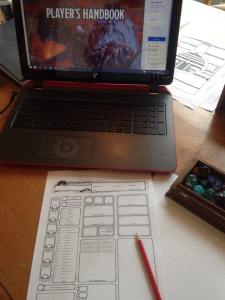
To build your character you will need:
The D&D players handbook (pdf is fine)
A set of character sheets (you can get these from here: https://dnd.wizards.com/articles/features/character_sheets)
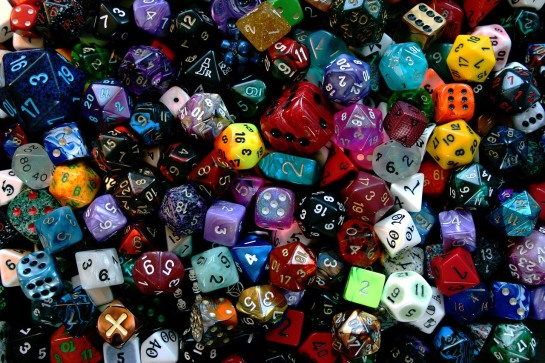
Dice
Some Scrap paper and a pencil

Step One:
The first step to building your character is to roll your stats. There are a few ways to go about this, some people prefer to start with a pool of stat points and choose where to allocate them, but the easiest and most fun in my opinion is to roll 4 D4’s and take the highest 3 numbers, added together that number becomes one of your stats. You then repeat this 5 more times. I like to roll all my stats first and then allocate them based on the type of character I have chosen to build. When I rolled for this character I got the following scores:
1. 14
2. 9
3. 15
4. 13
5. 10
6. 5
As you can see I got 3 pretty good rolls, 2 very average ones and one TERRIBLE roll. This is not necessarily a bad thing. Although it makes things a bit easier if you roll all high scores, having one or two really low ones can make for a more interesting character to roll play. In this case, since I had already decided that I was going to build a Dragonborn Fighter, I have decided to make his strength, dex and constitution scores high, his wisdom and charisma average and his intelligence very low. This means that he will be average in perception, survival and insight into what’s happening around him (this comes under wisdom),but maths, riddles, reading and even basic speech may be quite a struggle for this poor lad. But this leaves a LOT of room for some interesting role play and comedy elements that you can bring to your game.

Step Two: Pick a race
Your race is what decides what you look like and how other people will react to you in your game. Elves are well respected but are also considered to be quite aloof and sometimes a little racist, dwarves, humans and gnomes get along with most races, dragonborn are respected but people can be wary around them due to their size and fearful appearance but races such as Teiflings and Drow (dark elves) are openly feared as they are nearly all evil creatures.
For this character I chose a Black dragonborn who I have named Rhogar Delmirev.

 I used the ‘draconian male names’ to pick Rhogar’s name, you can do this or you can pick your own. To start building the character, go to the character traits (Draconian traits in this example) and add in each element to your character sheet.
Ability Score Increase: As we have not yet allocated the stats to our sheet, just make a note next to the boxes that are going to have increases (in this case my strength will get a +2 and my con will get a +1).
Age: Pick an age that fits in within the guideline, if you play a young character, you may not be taken seriously whereas an older character may struggle with fatigue or may be assumed to be weak by some, this would be up to your DM but it is something to keep in mind. I chose 26 for Rhogar which means he is at his physical peak.
Alignment: Is your character good or evil? Chaotic or lawful? This will make a huge difference to how you are perceived in the world and how you must behave. The manual will tell you what the most common alignment is for each race but this is only a guideline, I am currently playing a chaotic neutral Drow rouge who SHOULD be evil, but since I came up with a good back-story for her, my DM allowed me to play her this way. In Rhogar’s case, I picked Lawful Good as he is kind hearted and a soldier, this alignment suits him best.
Size: This one doesn’t come up too often but will affect moving through small space and what size mount you will need If you choose to buy one later on. Rhogar is 6 foot 8, so he’s a big, imposing character.
Speed: How far you can move each turn. This is not something you can choose, it is always set for you. This is particularly important if you use maps and figures when you play as each square on the map will usually be 5 feet.
Special Features and Traits: In Rhogar’s case this is his draconic ancestry (black dragon), his breath weapon (acid) and his special resistance (also acid), each character will have their own special features so fill this in as necessary in the ‘features and traits’ section of your character sheet.
Languages: Lastly, you will be given some base languages that your character knows, this is obviously handy when communicating with NPC’s in the world around you or listening in on conversations of your enemies.

Step Three: Choose Your Class
This is where you need to allocate your stats. Once you have found which class you would like to be, have a read through the information in that section of the handbook. If you are unsure where to place your stats (especially if it is your first time) look at the ‘quick build’ section, it will tell you what your most important stats will be to play that type of character. In Rhogar’s case, these are Strength and Dexterity, followed by Constitution. I chose to make Constitution his second highest stat as I plan to use him in close combat and since he is in heavy armour anyway, I felt Dex was slightly less important. Once your stats are allocated and you have added on any extra points allocated by your race, you can work out your ability modifiers. This is what you add to any attack or saving rolls during the game. Write your modifier in the little circles under the score boxes. The modifier can be worked our with the following table:

This is how I allocated out his stat scores including race bonus’s (ability modifiers are in brackets):
Strength: 17 (+3)
Dexterity: 13 (+1)
Constitution: 14 (+2)
Intelligence: 5 (-3)
Wisdom: 10 (0)
Charisma: (0)
Once this is done, fill in all the other class sections.
Hit Dice: This is what you roll each time you level up to add to your total hit points.
Starting hit points: This is your health, follow the instructions to determine this. In Rhogar’s case it is 10 + con mod, so his starting hit points level is 12.
Proficiencies: Any armour, weapon or tool proficiencies go into the proficiencies box along with your languages. If you try and use weapons or armour you are not proficient in, you will be at a disadvantage. However, during the game you can train to earn proficiencies in items that you really want to use, but it does take time and gold.
Saving Throws: Shade in the relevant circles in the saving throws section. In Rhogar’s case this is strength and constitution, which means he gets to add his proficiency bonus to these saving throws. Your proficiency bonus is noted in your character advancement table within each class so it is easy to keep track of when it goes up.
Skills: Pick a few skills among those listed, you get to add your bonus to checks based on these skills. I chose Strength and Animal Handling (this is handy for controlling a mount).
Equipment: Fill in the listed equipment you are given in the ‘equipment’ box.
 Step Four: Choose your Background
This is the last major section to complete for your character. Pick something that will help you in developing your back-story and your character traits. For Rhogar, I chose a Soldier.
Fill in the last few sections:
Skill Proficiencies: In the same section as last time fill in any extra skills you are given. Rhogar got Athletics and Intimidation.
Tool Proficiencies: Same again, add them to your ‘other proficiencies and language’ section. Rhogar got dice gaming and vehicles.
Equipment: Add in any extra equipment you are given and the starting gold that you receive. Soldiers don’t start with much 😦
Specialities: Like your race, each background will have a unique special feature. Add these into the ‘features’ section so you can remember them at a glance.
Suggested Characteristics: These are only a guideline, but filling in these sections will help with your role playing especially if you are new to it. I usually come up with my own personality traits that fit within my back-story, but you can either pick from the selection given OR like I did in this care, keep it random and roll for them.
 Step Five: Back-story
This is totally optional, but if you want to be able to role play your character well, it helps to build a good history for them. Find a picture that you feel represents them and fill in their back-story and allegiances on the second character building sheet that you are given from the wizards of the coast website. I did not do this for Rhogar as I don’t intend on playing him, he is just an example character, but here is what I filled in for my Drow Rouge, Nai.

My group gave me a bit of flack for how detailed her backstory is but I like to really know my characters before I play them.
Here’s what Rhogar’s character sheet looks all filled in:

I forgot to fill in his proficiency bonus, but as I said, he starts at a +2.
So I hope that helps you if you are new to the game and aren’t sure how to build your first character. If I have missed anything or if you have any further questions feel free to comment below. I will be doing a post soon about magic using but if there is anything else you would like to see as part as this series please let us know!
Until next time,
Tune In – Geek Out
K.


